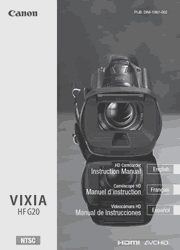
True video enthusiasts and advanced amateurs will find their inspirational match in the new VIXIA HF G20. Designed to rival pro-level camcorders in image quality, it’s equipped with a Genuine Canon 10x HD Video Lens with 8-bladed iris for stunning quality video and soft, beautiful background blur. The camcorder’s Canon HD CMOS Pro Image Sensor provides extraordinary flexibility with extended dynamic range, enhanced gradation, and significantly more light capture for 20% improved low-light performance*. You’ll record up to 12 hours of crisp HD video to a 32GB internal flash drive or simultaneously to 2 memory card slots (SDHC and fast, high-capacity SDXC). For extra assurance Relay Recording automatically switches recording to the SD memory cards when the internal drive is full so you never miss a moment – the second card takes over automatically when the first becomes full. Dynamic SuperRange Optical Image Stabilization keeps your video smooth and blur-free, even at the long end of the zoom, and Intelligent IS ensures effortless stabilization no matter what the shooting situation. The VIXIA HF G20 can deliver simultaneous output to both the Electronic Viewfinder with pro-style large eye cap, and the bright 3.5-inch Touch Panel LCD. For easy, high-quality shooting, Smart AUTO automatically recognizes and selects proper settings for 38 different scenes, and the camcorder’s rich array of manual functions and Professional Shooting Assist Functions bring a new level of control to your video. Your creativity is further supported with newly customizable Cinema-Look Filters to alter the mood and intensity of your video, and Touch Decoration options to add an element of fun and excitement.
Introduction
About this Manual
Supplied Accessories and CD-ROMs
Names of Parts
Preparations
Charging the Battery Pack
Preparing the Camcorder
Basic Operation of the Camcorder
First Time Settings
Using a Memory Card
Recording
Recording Movies and Photos
Quick Start Function
Selecting the Video Quality (Recording Mode)
Selecting the Frame Rate
Focus Adjustment
Zooming
Advanced Image Stabilization
Automatic Gain Control (AGC) Limit
Automatic Exposure Recording Programs
Exposure Adjustment
White Balance
Special Scene Recording Programs
Image Effects
Self Timer
Audio Scenes and Other Audio Settings
Using Headphones
Using the Mini Advanced Shoe
Using an External Microphone
Using an External Video Light
Color Bars/Audio Reference Signal
Video Scopes
Video Snapshot
Pre-Recording
Onscreen Displays and Data Code
Faders
Customization
Custom Button and Dial
Assignable Buttons
Saving and Loading Menu Settings
Playback
Playing Back Video
The Index Selection Screen: Selecting the Content to Play Back
Deleting Scenes and Stories
Dividing Scenes
Selecting the Playback Starting Point
Capturing Video Snapshot Scenes and Photos from a Movie
Video Stories and Cinema Style
Using Story Creator to Create Video Stories
CINEMA Mode and Cinema-Look Filters
Adding Decorations
Playing Back Stories from the Gallery
Rating Scenes
Playback with Background Music
Copying and Moving Scenes Within/Between Stories 113
Selecting a Story’s Thumbnail Image 114
Changing a Story’s Title
External Connections
Terminals on the Camcorder 116
Connection Diagrams 117
Playback on a TV Screen
Photos
Viewing Photos
Slideshow
Deleting Photos
Saving/Sharing Recordings
Copying Recordings to a Memory Card
Saving Recordings on a Computer
Copying Recordings to an External Video Recorder
Converting Movies and Saving to a Computer
Additional Information
Appendix: Menu Options Lists
Appendix: Onscreen Icons and Displays
Troubleshooting
Handling Precautions
Maintenance/Others
Optional Accessories
Specifications
Index
