Canon EOS 700D / Rebel T5i Camera Firmware Update Procedures
Precaution
- A power failure during the firmware writing operation may disable the camera.
- Use a fully charged Battery Pack or dedicated AC Adapter Kit (Optional) fo r the firmware update.
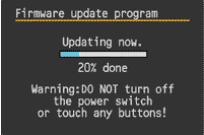
- Do not shut off the power during the firmware writing operation.
- Do not press any camera buttons dur ing the firmware writing operation.
- Do not open the card slot cover dur ing the firmware writing operation.
Firmware Update Procedures
In the following instructions, x.x.x. i ndicates either the current firmware version or the firmware version for the update.
(1) Prepare the items required to update the firmware.
- Camera body
- Dedicated Battery Pack (The battery pack must be fully charged) or dedicated AC Adapter Kit (Optional)
- SD card (64MB or more, 64GB or less)
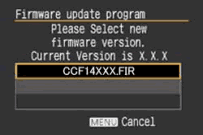
- Firmware update file (CCF14XXX.FIR)
In case of using the SD card reader, follow the proc edure from Step (2) onward. In case of not using the SD card reader, follow the procedure from Step (3-1) onward.
(2) Copy the firmware update file to the SD card.
- Insert the SD card that has been formatted in the Camera into the SD card reader.
- Copy the firmware update file to the first window t hat appears when the SD card is opened (the root directory).
- Remove the SD card from the card reader.
*When removing the SD card, be sure to do so as described in the documentation for the computer or the card reader.
*If the firmware update file is placed in subfol der of the SD card, the camera will not see it. - Rotate the Mode Dial to select <P> mode (or one of the other modes in the creative zone).
- Insert the SD card with the firmware into the camera.
- Turn the Power Switch <ON>, and then pre ss the <MENU> button to display the menu.
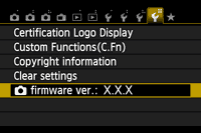
- Press the Cross keys to select the "Firmware Ver.x.x.x" item at the botto m of the "Set-up 4 (Yellow)", and then press the <SET> button.
- The firmware update screen will appear.
Press the Cross keys to select [OK], and then press the <SET> button.
Follow the procedure from Step (4) onward.
*If the firmware update screen does not appear on LCD monitor, the firmware update file may not have been properly copied to the SD card, so please try again starting from step (2).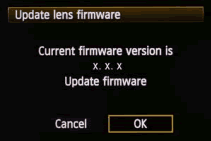
Section (3-1) and later sections explain how to update the firmware using EOS Utility.
(3-1) Connect the camera and the computer.
- Rotate the Mode Dial to select <P> mode (or one of other modes in the creative zone).
- Insert the SD card that has been formatted in the camera into the camera.
- Connect the camera and the computer with the USB c able, and then set the camera's power switch to <ON>.
(3-2) Start the firmware update.
- Start EOS Utility.
- Click the [Camera settings / Remote shooting] button.
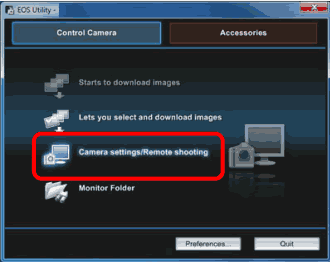
- Click [
 ], and then click the [Firmware Ver. X.X.X].
 - The firmware update screen will appear on the computer screen. Click [OK].

- A window for selecting files appears, so select the firmware update file, and then click [Open].
- A confirmation window appears, so click [OK].
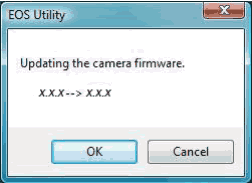
- A window with cautionary messages about the update appears, so click [OK].
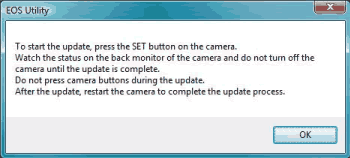
- Follow the procedure from Step (4) onward on the camera.
(4) Update the firmware.
- The screen will appear on the camera's LCD monitor.
- If you press the <SET> button, a confirmation screen will appear, so check the firmware update shown, press the Cross keys to select [OK], and press the <SET> button again to start the firmware update.

- The message will appear during the update.
- When the update is comple ted, the message will appear on the camera's LCD monitor.
- Complete the firmware update by pressing the <SET> button.
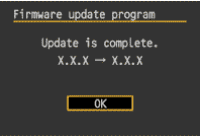
The firmware update is now completed.
When the firmware update operations are finished, turn the camera <OFF> and re move battery from the camera for at least two seconds. This will cause the new firmware to take effect after the battery has been reloaded and the camera is turned on.
Format the SD card before using it again.
Verifying the firmware Version
- Turn the Power Switch <ON>, and press the <MENU> button.
- Press the Cross keys, and you will see the "Firmware Ver.X.X.X" at the end of the settings shown in "Set-up 4 (Yellow)".
- This is the currently installed firmware version number.
Note: Select P mode (or one of the other modes in the creativ e zone). The version of the firmware will not appear in the basic zone.
If an ERROR message appears during the firmware update
If this screen appears, remove the batte ry and check to make sure that there are no problems with the battery capacity or with the firmware update file on the SD card.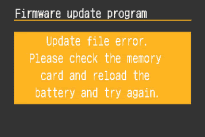
If there are no problems, repeat the update operations again.
If the problem persists, please contact the C anon Customer Support Center in your region.
Return Canon EOS REBEL T5i/EOS 700D Camera Firmware Update 1.1.3